Getting started with Web NFC
In preparation for the Stay-at-home TH/NG Jam next Friday, I thought I'd at least check if I can get the basic tech, including Web NFC, working.
Web NFC is an open specification, but so far it is only supported on Chrome for Android behind a feature flag, meaning you'll have to enable experimental web platform features in chrome://flags. It has also been available as an origin trial since Chrome v81.
First, we need a basic index.html file:
<html>
  <head>
    <title>Smart Paper Maps</title>
    <script src="main.js"></script>
    <link rel="stylesheet" type="text/css" href="main.css">
  </head>
  <body>
    <button id="scan" class="buttons">Scan</button>
    <p id="p1" class="text"></p>
  </body>
</html>
All we're doing is linking to our main.js and main.css files, and setting up a button and a <p> section that we can use to display text. Our main.css just makes the button and text a bit bigger to make it easier to tap and read:
.buttons{
    height:200px;
    width:200px;
    font-size: xx-large;
}

.text{
  font-size: xx-large;
}
And finally, the actual code that reads the NFC tags:
document.addEventListener('DOMContentLoaded', event => {
  const scanButton = document.getElementById('scan');
  const reader = new NDEFReader();

  scanButton.addEventListener('click', async () => {
    try {
      console.log('Scanning..');
      await reader.scan();
    } catch(e) {
      console.error("Error: ", e);
    }
  });

  reader.onreading = event => {
    console.log('Event:', event);
    document.getElementById("p1").innerHTML = event.serialNumber;
  };
});
We wait for the page to finish loading, initialise the NFC tag reader module NDEFReader(), and wait for the “Scan” button to be clicked. When we click the button, the browser will prompt for permission the first time. Once permission is granted, it will start scanning for NFC tags, and display the serial number when a tag gets read.
Because Web NFC requires an HTTPS Server, you'll have to set up a basic one to get this working. I'm using Node.js 12, and saved the following as simple-http-server.js:
const https = require('https');
const fs = require('fs');
const express = require('express');

const options = {
  key: fs.readFileSync('newkey.key'),
  cert: fs.readFileSync('newkey.crt')
};
const app = express();
app.use(express.static(__dirname));

https.createServer(options, app).listen(8080);
Do an npm install to install the Express server module, and set up the SSL keys using:
openssl req -x509 -sha256 -nodes -days 365 -newkey rsa:2048 -keyout newkey.key -out newkey.crt
Then run it with node simple-http-server.js. If you don't see any errors, you did it right. Go to <your computer's IP address>:8080 to access the page. You'll see some security warnings that you'll have to acknowledge, since we created our own self-signed keys.
I want to be able to view and debug my phone on my computer. Luckily, Chrom(ium) and Android makes this really easy. First, enable developer options on your Android phone and plug in your device via USB. To enable remote debugging, go to chrome://inspect/#devices in Chrom(ium) on your computer. You should be able to see your phone under Remote Target, and can then click on Inspect under the right browser tab to view your phone screen and the Chrome developer tools.
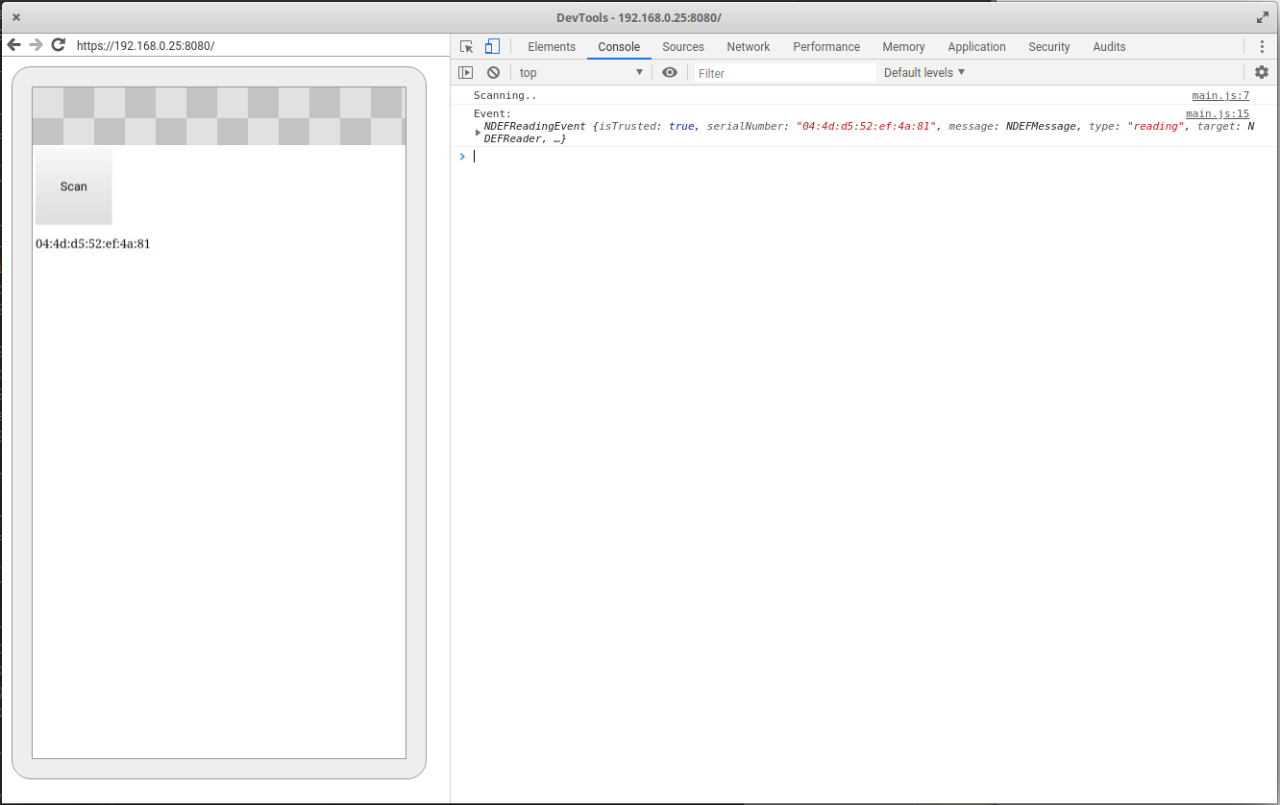
Hopefully, if everything is working, you'll see the following when you press the scan button and move over an NFC tag:
I’m publishing this as part of 100 Days To Offload. You can join in yourself by visiting https://100daystooffload.com.
Comment on this post